Thursday, July 19, 2018

5 Methods to Fixed: Blank White Screen on Mac Problem 2018-2019


5 Methods to Fixed: Blank White Screen on Mac Problem

5 Methods to Fixed: Blank White Screen on Mac Problem

blank white screen Mac stuck on white screen

Method 1: Boot up in safe mode [Mojave & earlier macOS]

Prerequisite: macOS allow to safe mode on boot up.
This process Check you disk and repair correct issue automatically regarding software error.
Shutdown Mac, Now Press power + Shift key at once, until you see Apple logo.
Once turn on Mac in safe mode, Restart from Top Apple menu > Restart.

Method 2: Fix by restore OSX from Disk Utility

Press and hold down Command + R + Power button at once, until you see power up, Now Select Disk utility.
Select your OS from the left pane and First aid from top tab.
Click on run button from the popup, after verify it will repair disk problems.

Method 3: Reset Memory: PRAM (Parameter random access memory)

PRAM store important Mac’s system settings – Clear Mac RAM
Shut down your Mac, then press and hold Option + Command + P + R + Power button at once, While booting your Mac.
Lift up all the fingers at once, next screen doesn’t appear on screen but in the background, it will reset settings data (Back to default mode).

Method 4: Restore MacOS

Shut down Mac, Then start Mac with the power button,
Next, Press and hold Command + R during startup screen
Now, Disk Utilities windows will appear on screen, Click on Reinstall OS X.

Method 5: Hardware issue Mac Mojave or earlier macOS

For this matter, there would be a serious hardware issue. So Check Device warranty, and try contact nearest apple support center for your fix.
Above all are the technically right solutions that work for repair Blank white screen on Mac problem in different ways depending on user’s causes.Jihosoft iPhone Backup Extractor Extract and recover all types of data from iPhone backup files, such as camera roll photos, videos, SMS, contacts, reminders, WhatsApp, and etc.
Gihosoft Free iPhone Data Recovery is a professional iPhone Data Recovery software to get back all your lost text message, photo, video, call history, note, contact and more from iPhone/iPad/iPod Touch.

Tuesday, July 17, 2018

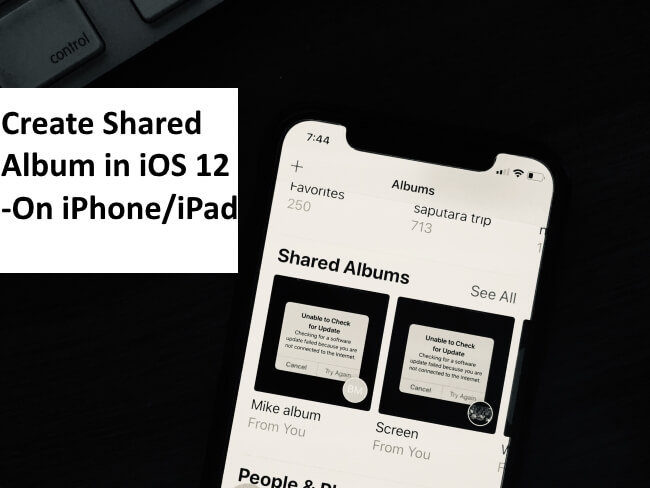
How to Create iCloud Photo Album in iOS 12 on iPhone X/8/8 Plus, iPad 2018 update

Compatible Models are iPhone X/ iPhone 8/iPhone 8 Plus, iPhone 7/7 Plus, iPhone 6S/6S Plus, iPhone 5S, iPad and MacOS Mojave compatible Macs.

After Create Shared Album we can generate the public link for share and View none icloud.com friends (Android and Windows): Share iCloud Album with anyone.
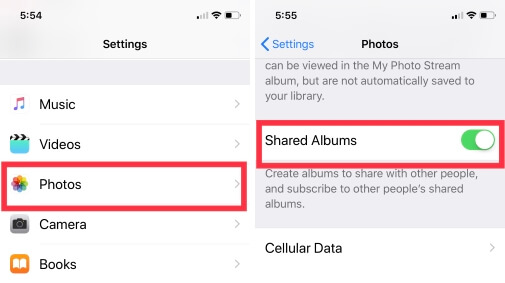
First, You Need to Enable Shared Album on your iPhone. Here’s how you can enable it.


Step 1: Launch “Settings”.

Step 2: Open “Photos” and turn on “Shared Album”.


Now We Will See How to Create iCloud Photo Album in iOS 12 on iPhone/iPad

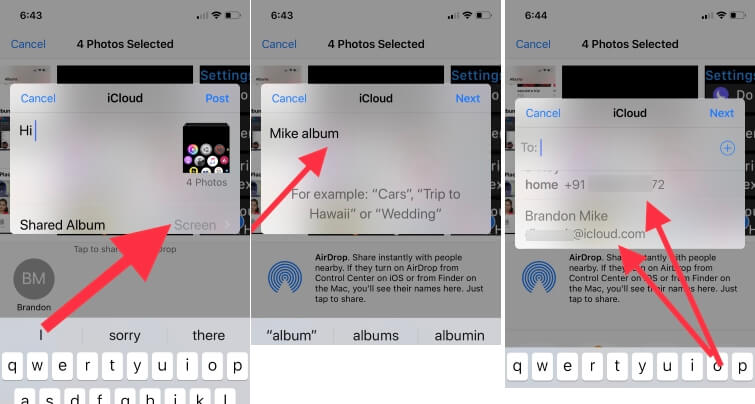
Step 1: Open up “Photos” app from the home screen of iPhone.

Step 2: Next, make a selection of pictures and videos which you want to share with iCloud.


Step 3: Tap “Share” icon.


Step 4: From the options swipe to select “Shared Albums”.


Step 5: Tap “Shared Albums”.

Step 6: In the “Comment Box” you can entitle the album. Tap “Post”.That’s it.

Jihosoft iPhone Backup Extractor Extract and recover all types of data from iPhone backup files, such as camera roll photos, videos, SMS, contacts, reminders, WhatsApp, and etc.


If you want to create a new group, then follow the below steps.

Make sure that the person which you are inviting in the group has also enabled shared album in iPhone otherwise you have to face unexpected error.

Step 7: Below comment box, you can see Shared Album-Family (any name), will be written.

Step 8: If you want to create new “Shared Album” then tap on it. It will redirect you to next screen and there tap (+).

Step 9: Label the “Shared Album”. Tap “Next”.

Step 10: Add people with whom you want to share the album. Tap on (+).

Step 11: Move further by tapping “Next”.

Step 12: Now you have to give a specific name to your “Shared Album”.

Step 13: Tap “Post”. It’s done.


Gihosoft Free iPhone Data Recovery is a professional iPhone Data Recovery software to get back all your lost text message, photo, video, call history, note, contact and more from iPhone/iPad/iPod Touch.


Sunday, July 15, 2018

2 Free Ways to Backup WeChat without iCloud 2019 Guide


2 Free Ways to Backup WeChat without iCloud 2019 Guide


1. Backup WeChat with iTunes


The very first method to backup WeChat without iCloud is by using iTunes. Before you start to take back up of WeChat from your iPhone, ensure that your device battery has been charged enough. Low battery might interrupt the process and cause damage to your iPhone's underlying data during backup. Here is the process for WeChat backup with iTunes:


At first launch the 'iTunes' software on your computer after downloading the newest version available. Now, connect your iPhone and computer using an USB cable.


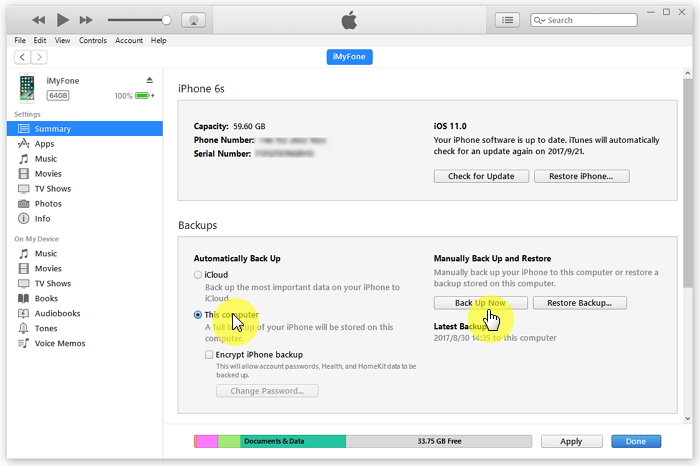
iTunes will take a while to detect your iPhone. After that tap on the iPhone icon from its main screen and then click the 'Summary' tab.


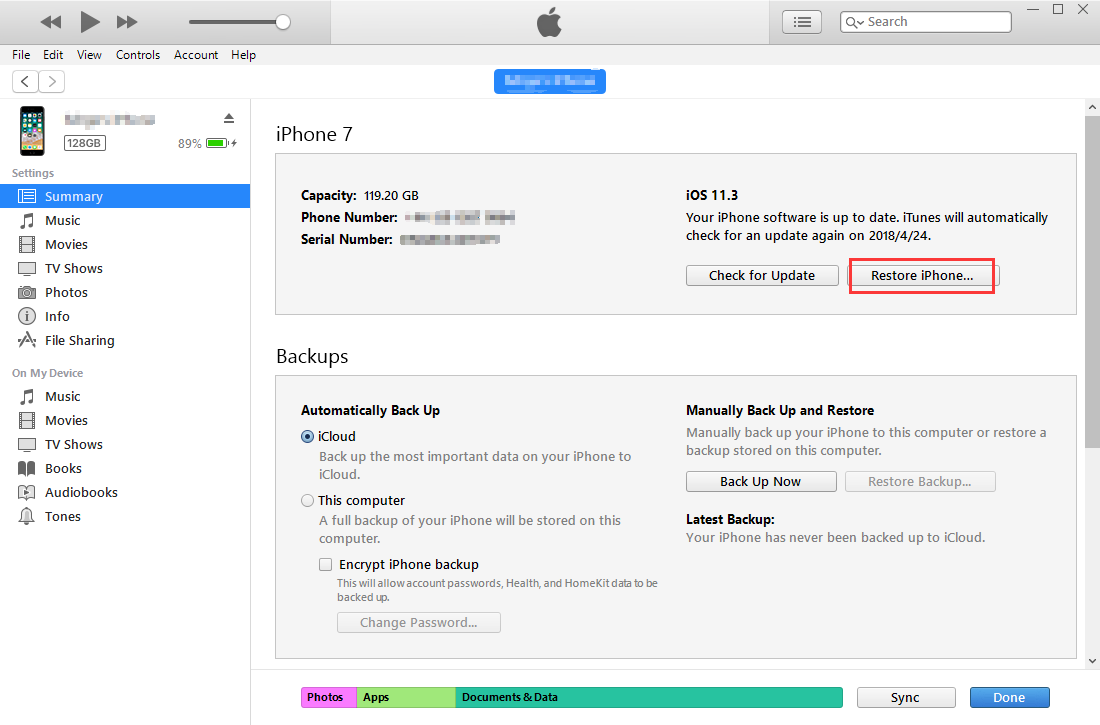
Under the 'Summary' tab, go to 'Backups' and choose the 'This computer' option. Now, click 'Back Up Now' button to start the backup process.


At the end of this process, iTunes will backup your WeChat into your computer along with all other device data.


2. Backup WeChat to Computer using WeChat Web (Desktop App)


Next method with which you can backup WeChat to your computer is via WeChat Web for PC, available for both Windows and Mac Systems. Using this software you can backup WeChat without iCloud (entire chat history) to your computer and restore it later whenever you need. First, download the computer specific (Mac or Windows) software on your computer and then follow the guide below.


Step 1: First of all install the latest version of WeChat Web desktop software and launch it.


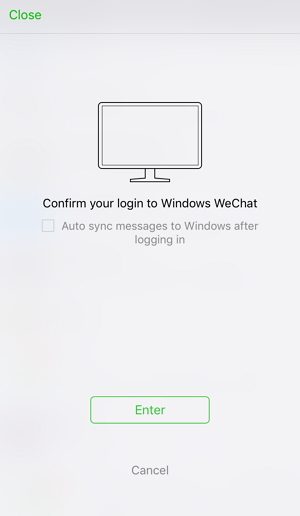
Step 2: Now, you need to open WeChat on your iPhone and get into the 'Discover' section, then tap on 'Scan QR Code'. Now, scan the QR code shown on your 'WeChat Web for PC' screen and your iPhone will be connected wirelessly to the PC, for creating a backup. On your phone confirm the action.


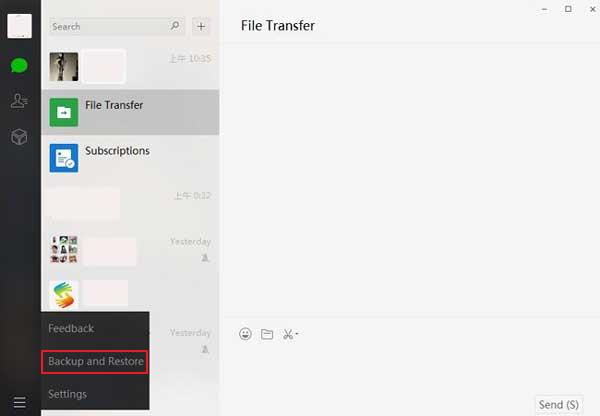
Step 3: Now, on the WeChat Web screen tap the 3 horizontal bars found on the bottom left corner. Select 'Backup & Restore'.


Step 4: You will see a pop-up window, click 'Backup to Computer' and confirm the action on mobile. It will backup WeChat without iCloud and prompt you to confirm. Hit 'OK' when process is over.


If you accidentally deleted or lost videos on iPhone, first please check on the Recently Deleted folder. Alternatively, you can use the professional tool Gihosoft iPhone Recovery to recover deleted iPhone videos from Camera Roll or some apps.
You may also like:


How to Use Podcasts Chapters on iPhone and iPad Running iOS 12


How to Use Podcasts Chapters on iPhone and iPad Running iOS 12


Important: Do note that not all podcasts may support this new feature yet.


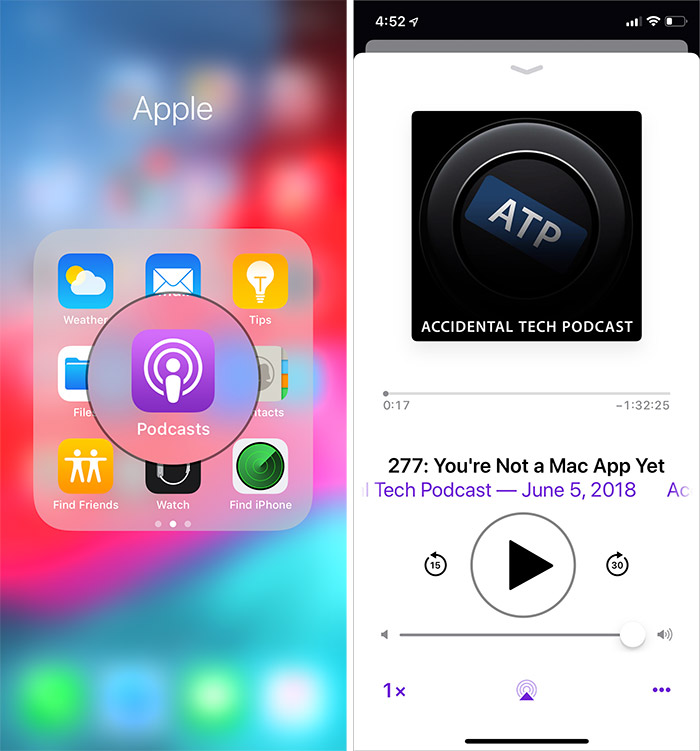
Step #1. Launch Podcasts app on your iOS device. Then, select an episode and play it.


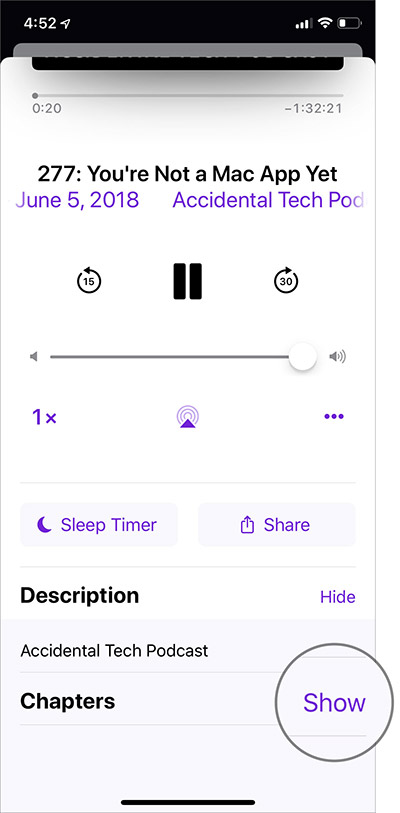
Step #2. Now you need to scroll down to the bottom and locate Chapters below Description. And, tap on Show.


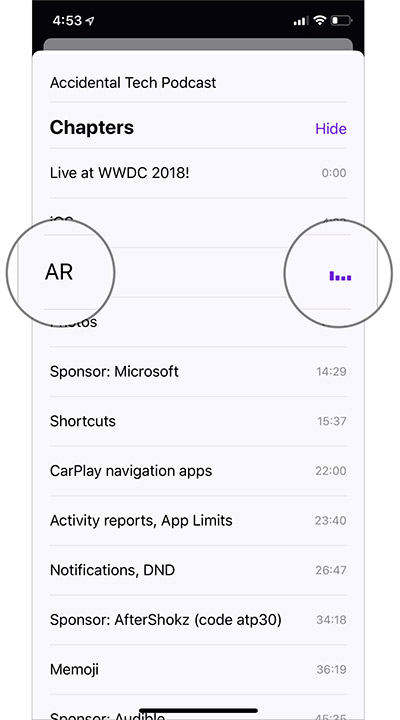
Step #3. Next, you can see all the available Chapters in the list.


Choose a new chapter to start listing to it. Now you can see the tiny purple equalizer animation on the right. It makes it pretty easy to find out which chapter you are listening now.


Step #4. Once you have viewed the chapters, tap on Hide to conceal them.


Share Podcast in iOS 12


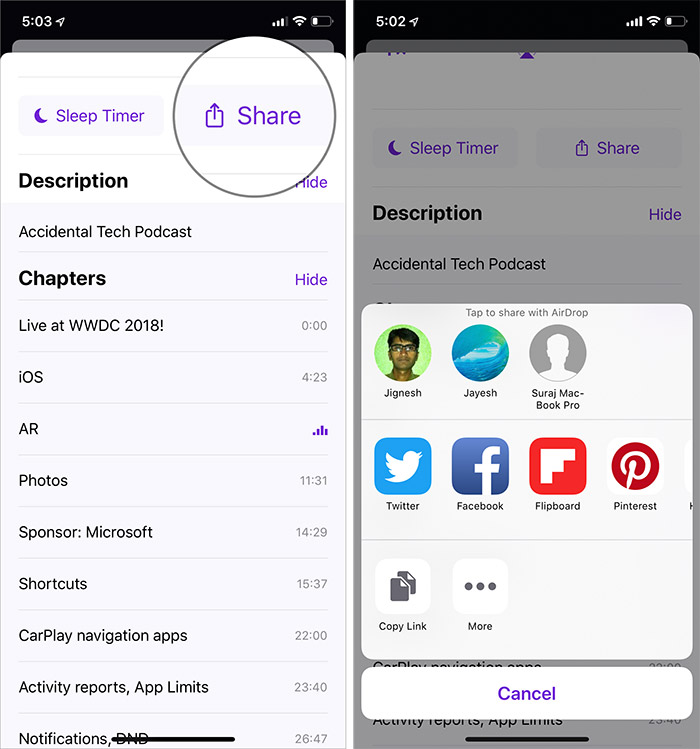
So far there is no way to share a particular portion of episode. However, you can share postcast by tapping on Share button. Then select the preferred medium in the share sheet.


That’s all folks!


Gihosoft Free iPhone Data Recovery is a professional iPhone Data Recovery software to get back all your lost text message, photo, video, call history, note, contact and more from iPhone/iPad/iPod Touch.

Saturday, July 14, 2018

Recover Music Disappeared from iPhone via iTunes 2019 Guide


Recover Music Disappeared from iPhone via iTunes


Most often, iPhone users sync their crucial files such as videos, mobile applications, music files, and images to iTunes to create a backup. It is an excellent idea as it will be easier for them to retrieve their lost data from the backup in case of an accident.


To recover disappeared music files with iTunes Backup, follow these steps:


Step 1: Make sure you connect your iPhone to a PC and run the iTunes on the computer. A message will come up, and you will get a request for the passcode of your phone, input the details and follow the instructions.


Step 2: Once there is a connection, select your type of iPhone and tap on the option “Summary> Restore Backup”.


Step 3: You can choose the most critical backup from the list and select the option “Restore” to start the process of data recovery.


Ensure your phone is connected during the process of data recovery, failure to do so will prevent you from regaining your data.Sponsor Ads:


Gihosoft Free iPhone Data Recovery is a professional iPhone Data Recovery software to get back all your lost text message, photo, video, call history, note, contact and more from iPhone/iPad/iPod Touch.


iTunes is not devoid of its shortcomings as you can only get your video and audio files in mp3 and mp4 only. Another limit of the iTunes is that you have to buy a music file that is mistakenly deleted from your iPhone again. There is a limit to the recovery of your necessary data, and not everyone is comfortable spending much money on new music and video files. A computer must power iTunes, and this could cause stress for the iPhone user. It does not work at a fast pace on computers that run on the Windows software.

Thursday, July 12, 2018

How to Unlock a Disabled iPhone 4 without iTunes ?

How to Unlock a Disabled iPhone 4 without iTunes via iCloud

When your iPhone is disabled or locked, as a result of a forgotten access code or if the screen is broken, you would need to connect your iPhone or any iDevice to a computer then go through iTunes to unlock your device. However, this will erase your all data from your phone/device. This can be a problem if you haven’t backed-up via iCloud. However, steps below will tell you how to unlock a disabled iPhone without iTunes.

Step 1: From another device, go to iCloud.com or the Find My iPhone application.

Step 2: If required, just sign in with your Apple ID.

Step 3: Click “All Devices” right at the top of the browser window. Then select the device you desire to delete.

Step 4: Click on the “Delete [device]”. After you have deleted the device, then click on the “Delete Account” button. That’s it, your device is unlocked.

Step 5: At this point, you can restore from your backup.


How to Unlock a Disabled iPhone without iTunes via Siri

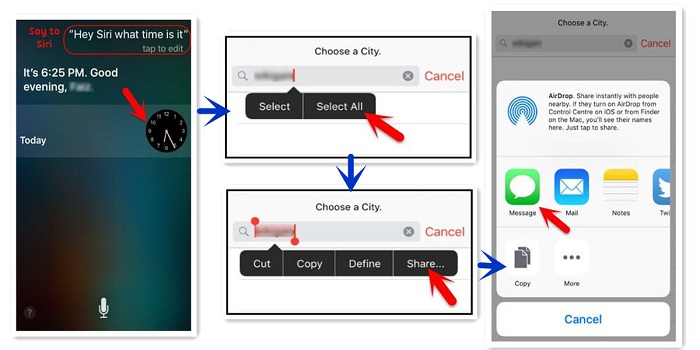
You may not know that you can also use Siri to solve the issue of the disabled iPhone screen, which was originally speculated to be a bug in iOS that can only be used for devices running iOS 8.0 to iOS 11. To perform an iPhone or iPad disable hotfix without iTunes, follow the steps below to proceed.


Hold the Home button to activate Siri and ask for the present time, or anything else that would display the clock.


Visit the World Clock and click to add another clock, and then type anything on the “Select all” option.


Then you will see various options like cut, copy, define, etc. Tap on the “Share” option.


Another window will be open, tap on the message icon to continue.


Type something in the “To” field and tap the return button on your keyboard.


This will highlight the text in green color. Select it and click the plus icon.


Another window will be open, tap on the “Create new Contact” button.


On this screen, choose to add a photo and tap on the “Add Photo” option.


This will open the Photo Library. Now, you can visit any album.


Instead of selecting a picture, just exit by pressing the Home button. Then you can back to the home screen.

If you accidentally deleted or lost videos on iPhone, first please check on the Recently Deleted folder. Alternatively, you can use the professional tool Gihosoft iPhone Recovery to recover deleted iPhone videos from Camera Roll or some apps.
Wednesday, July 11, 2018

The Manual Way to Uninstall the Uninstall the Older Version of iTunes


The Manual Way to Uninstall the Uninstall the Older Version of iTunes


You can uninstall iTunes manually. The process is a bit lengthy but all the steps are easy to perform. The key to this method is to uninstall iTunes and its related components in a specific sequence. Keep in mind that iTunes may not be fully uninstalled if you uninstall its related components in the wrong sequence.


Follow these instructions:


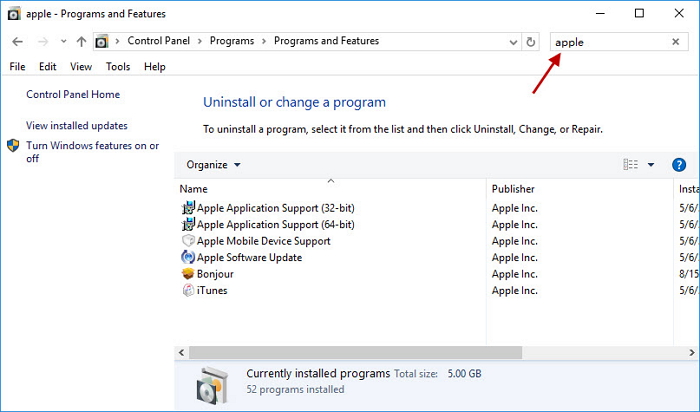
Step 1: On your Windows PC, open Control Panel and then navigate to Programs > Programs and Features.


Step 2: Now uninstall the following programs in the same sequence as listed below:


iTunes


Apple Software Update


Apple Mobile Device Support


Bonjour


Apple Application Support


Step 3: It is also recommended to uninstall iCloud.


Step 4: Once all the programs listed above are uninstalled, restart your computer.


Step 5: After your computer is restarted, delete the following folders:


C:\Program Files\Bonjour


C:\Program Files\Common Files\Apple\


C:\Program Files\iTunes\


C:\Program Files\iPod\


Note 6: If you are using a 64-bit version of Windows, then you will need to navigate to Program Files (x86) folder instead of Program Files.If you accidentally deleted or lost videos on iPhone, first please check on the Recently Deleted folder. Alternatively, you can use the professional tool Gihosoft iPhone Recovery to recover deleted iPhone videos from Camera Roll or some apps.
After all the above mentioned folders are deleted, restart your computer again. Now you will be able to install the new version of iTunes on your computer without any issues.

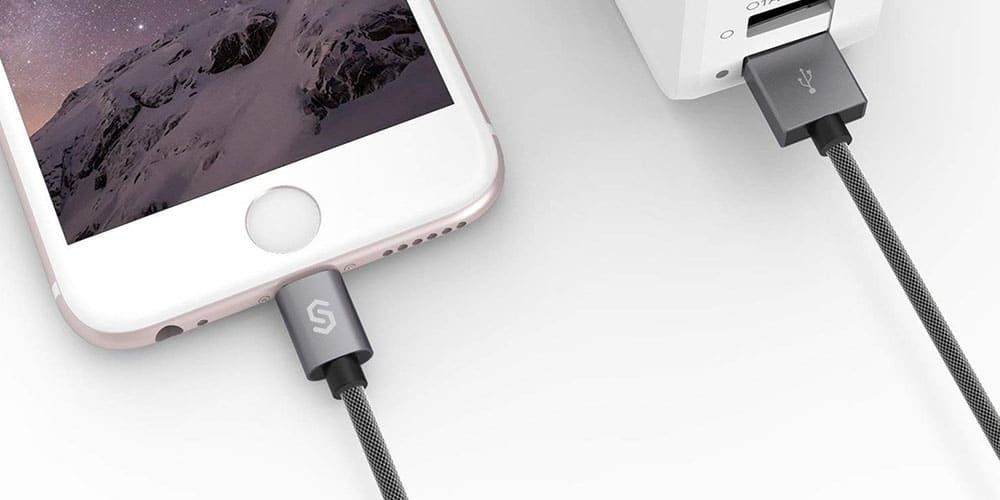
Find Your Next Dependable Charging Cord Here [Deals Hub]

There’s no such thing as too many charging cables. Fortunately, these days there are plenty of options when it comes to color and length. We...