Sunday, February 17, 2019

How to Recover Apple ID Password: Full Guide in 2019


How to Recover Apple ID Password on iPhone

If you have access to your iPhone and you have enabled two-factor verification (note: this is different than two-step authentication, which is discussed below) then, you may be able to recover apple ID password from your iPhone/iPad.
Step-By-Step Instructions

Step 1: Go to your device settings.

Step 2: Tap your name > select Password & Security > Change Password. You will see a series of instructions that will help you reset your password.
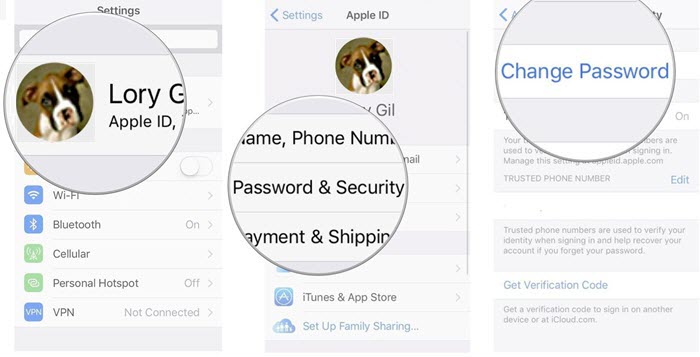


If you have iOS that is 10.2 or earlier, you should instead select iCloud > your name > Password & Security > Change Password.
How to Recover Apple ID Password from Apple ID Management Page

If you want to recover your apple ID password without using your phone, you can do so at Apple ID management page. This will allow you to use your email to recover and reset your password.
Step-by-Step Instructions

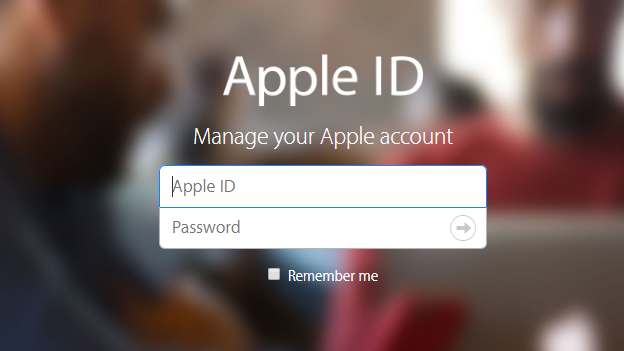
Step 1. First, go to the landing page for your Apple ID account. Then select "Forgot Apple ID or password."


Step 2: Next, enter your apple ID and then click "continue." This will take you to the options for resetting your password.
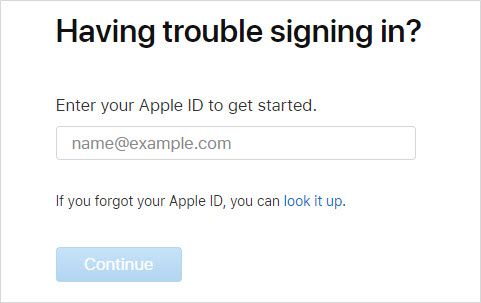


Step 3: Choose one of three options: answering your security questions; getting an email; or (will require phone) sending a recovery key.

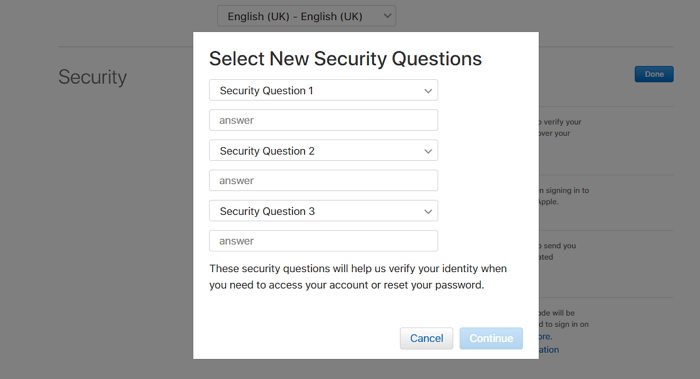
Step 4-A: If you choose security questions, answer the questions with the correct answers and you will be taken to a page to reset your password.


Step 4-B: If you choose email, input the email that you used to create your account or the back-up email that you've designated as a 'rescue' email address.


Step 5. Reset your password. Be sure to choose something you can remember.
How to Recover Apple ID Password with Two-Factor Authentication

If you have previously enabled two-step authentication on your Apple ID, then you can use this process now to reset your password.
Step-by-Step Instructions

Step 1: Go to Apple ID account page. Select "Forgot Apple ID or password."

Step 2: Enter your apple ID and then select "reset password" and select continue.

Step 3: Choose to send your recovery key to a trusted device, in this case, your iPhone. When you receive the key, input this recovery key on your account page to verify your identity.
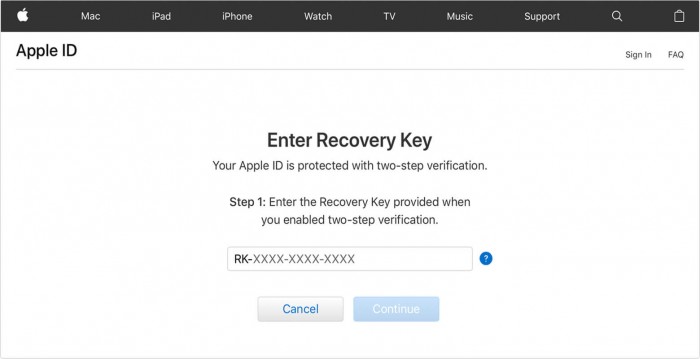


Step 4. You will be directed to a page where you can create a new password. Be sure that the password is something you can remember in case you need to input it onto your iPhone in the future!

Sponsor ads:Free Antivirus for iPhone

Must Read:If you lost data after you updated to a new iPhone, you can always use Gihosoft iPhone Data Recovery to get the data back from the old iPhone or backup.

Gihosoft Free iPhone Data Recovery:iphonerecovery.com


If you use android phones, please choose Gihosoft Android Data Recovery

Tuesday, February 12, 2019

Fix iPhone X/XS/XS Max Won’t Turn On (2019 Updated)


Tip 1. Hard Restart Your iPhone X

You might need this solution when suddenly your iPhone X or iPhone XS won’t turn on due to software problems. If you can't seem to restart it effectively, you can use the steps below turn it back on. Again, you might want to identify the cause behind your blackout iPhone. You can go through these steps if nothing is working out.

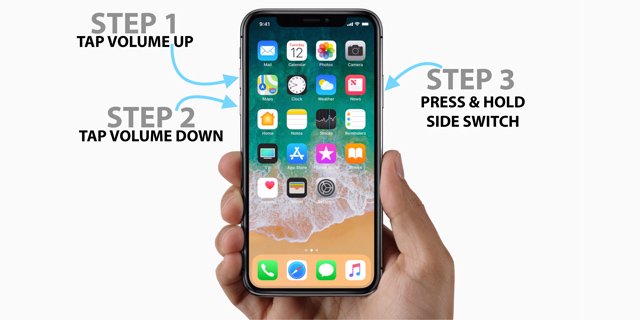
Step 1. This is especially for the iPhone X series. Press the button of volume up and release it quickly. Again, repeat the same process for volume down button.

Step 2. Press your thumb on the lock button and hold it for a while. Release it immediately when the Apple logo appears.

Step 3. Your iPhone X will start to work fine again. You might want to check up on the software update after this.


Tip 2. Charge iPhone and Force Restart

Your iPhone X might face the problem of drained battery. This problem can usually occur in your iPhone where you forget to charge appropriately. When you iPhone X runs out of battery, your iPhone may become unresponsive.

Sometimes even with the charging, you cannot seem to turn on your iPhone X. This happens because firmware ends up crashing your device. It further fails to respond to the connected charger. As time goes on, you will see that it starts to respond to your request. Follow the critical steps below to turn your phone back to normal.

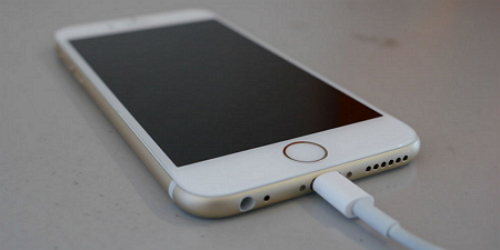
Step 1. Get your original charger and plug it into your iPhone X.

Step 2. Leave the phone just like that for 10 to 15 minutes at least, even if it doesn't turn on.

Step 3. Press the button of volume up and release it immediately.

Step 4. Press the button of volume down and release it quickly.

Step 5. Press the lock button with your thumb and hold it. Do not release it until the Apple logo appears.

Step 6. Your iPhone X would run correctly after this.


Tip 3. Update iPhone X Apps to the Latest Version

Bad applications can cause your phone to freeze and blackout. These applications usually halt the process of booting up. The critical solution for this situation is to update app version. An update always ensures that your application starts to behave naturally. Sometimes it is difficult to make sure that you have updated all your installations appropriately. The primary reasonmay be that you have cancelled the auto-update option. Follow the instructions mentioned below to ensure that you don’t end up facing blackout problems again.

Step 1. Go to the app store on the home screen of your iPhone X.

Step 2. Keep scrolling down and go to the updates section. It will show you a list of all the pending updates of apps.

Step 3. Tap update all and wait for the apps to get updated.


Ensure that all the apps are updated after you have successfully restarted the phone. This step will make sure that the same situation does not occur again.
Tip 4. Reset All Settings on iPhone X

When your phone is often troubling you, the reset option can help you to overcome all the problems. It helps you to deal with invalid settings that might have become a problem for your iPhone X. You might want to follow the steps below so that you reset all the settings appropriately after you turn your phone back on.

Step 1. Go to the home screen and touch settings option.

Step 2. Click General and tap Reset.

Step 3. Select ‘Reset All’ settings option.

Step 4. Enter the password of your device.

Step 5. Tap confirm and reset your iPhone settings.


Your phone will restart after this process, and you won't be facing the problems again.

Sponsor ads:

Gihosoft Free iPhone Data Recovery:https://www.gihosoft.com/iphone-data-recovery-free.html

Gihosoft iPhone Data Recovery Free

Free iPhone Data Recovery Software for Windows/Mac

Recover up to 12+ types of files, including contacts, SMS, photos, WhatsApp, Viber, notes, etc.

Restore lost data from iOS devices directly or from iTunes and iCloud backup

Recover iPhone data lost due to iOS upgrade/jailbreak, accidental deletion, device lost or broken

Support all the latest iPhone, iPad and iPod Touch

Both Free and Pro version.

If you lost data after you updated to a new iPhone, you can always use Gihosoft iPhone Data Recovery to get the data back from the old iPhone or backup.You may also like: iphonerecovery.com

If you use android phones, please choose Gihosoft Android Data Recovery.

With Gihosoft Android Data Recovery, no longer afraid of data loss!

Must read:Youtube video downloader for pc

Gihosoft RePicvid Free Photo Recovery Software provides a free photo recovery software for windows to help users recover the deleted or lost photo for free.

Jihosoft Android Data Recovery: the best Android Data Recovery software for Windows and Mac to recover deleted contacts, messages, photos, videos, WhatsApp and etc from Android devices.Tips:How to transfer messages from iPhone to iPhone


jihosoft Free iPhone Data Recovery

Saturday, February 2, 2019

Recover Photos from Dead/Broken iPhone 2019


Did your iPhone crash? Did you drop it and now it's broken or dead? You must care more about the photos on the device than the device itself. This happens to a lot of iPhone users. My friend just got back from a long holiday, with over 500 photos taken on his trip when he accidentally dropped his iPhone. Just like you are right now, he was more worried about getting back the photos on his broken iPhone.

As what I told my friend, I will explain everything you need know to recover photos from a dead or broken iPhone even it is running iOS 12.


What to Do First
1. Try to Fix iPhone to Avoid Data Loss

If you dropped the iPhone in water and water damage is what you're dealing with, try the following to dry off the device.

1. Get your iPhone out of the water as fast as possible.

2. If it's still on, turn it off because running a wet electronic device could damage it permanently. Dry it with a towel and try putting it in dry rice for a few hours.

3. Be patient and don't try to turn it on. Leave it alone for a few days.

If the screen is broken but the device is still fully functional, ask a professional repair shop to fix it. Just be sure to inquire whether the data will be wiped or not during repair.


2. Check If the iPhone is Synced with iTunes or iCloud

Most people won't back up their iPhone via iTunes regularly since you need a computer and USB cable to manually back up your data. Unlike iTunes, iCloud will automatically back up your device each day through the network, if the following conditions are met:


You have turned on iCloud Backup in Settings > iCloud > iCloud Backup.


You have connected your device to a power source and to a Wi-Fi network.


You still have available space in iCloud.

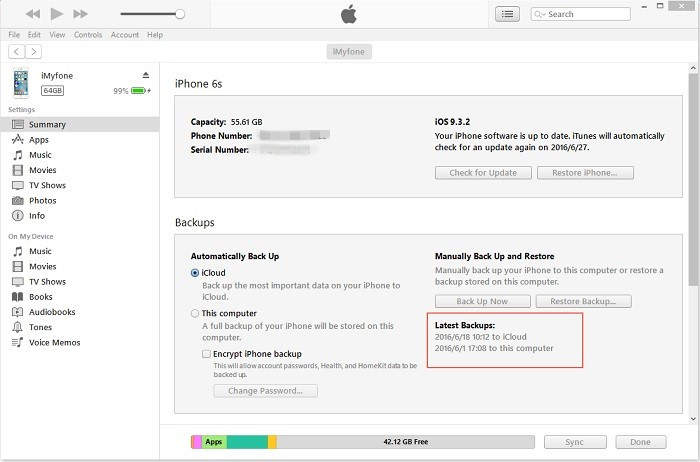
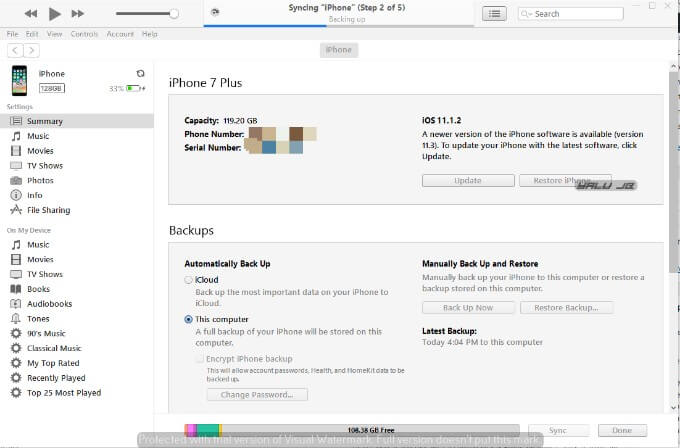
Check whether there is the latest backup on your computer or iCloud that could contain the photos you want. If you had turned on iCloud, the photos could also be backed up to iCloud.


Note

However, restoring the backup file may erase all data and settings on your old iPhone and you cannot choose to recover just photos.

Sponsor ads:

Gihosoft Free iPhone Data Recovery:iphonerecovery.com

Free iPhone Data Recovery Software for Windows/Mac

Recover up to 12+ types of files, including contacts, SMS, photos, WhatsApp, Viber, notes, etc.

Restore lost data from iOS devices directly or from iTunes and iCloud backup

Recover iPhone data lost due to iOS upgrade/jailbreak, accidental deletion, device lost or broken

Support all the latest iPhone, iPad and iPod Touch

Both Free and Pro version.

If you lost data after you updated to a new iPhone, you can always use Gihosoft iPhone Data Recovery to get the data back from the old iPhone or backup.

Top 10 Best FRP Bypass Tools to Bypass Google Account on Android Device 2019

Worth reading:download youtube 1080p

Jihosoft Android Data Recovery: the best Android Data Recovery software for Windows and Mac to recover deleted contacts, messages, photos, videos, WhatsApp and etc from Android


If you use android phones, please choose Gihosoft Android Data Recovery
Thursday, January 31, 2019

iTunes 12.9.4.61 disables upgrade/downgrade from local IPSW files


The latest beta of iTunes disables upgrades and downgrades from local IPSW files. Here’s what this means for the jailbreak community and how you can bypass this limitation.

Table of Contents


iTunes’ latest beta disables local upgrade/downgrade


How to upgrade/downgrade to local firmware versions


Downgrade iTunes to 12.8.2


Use third-party tools
ITUNES’ LATEST BETA DISABLES LOCAL UPGRADE/DOWNGRADE

Reddit user “IAMATyrannosaurusAMA” was the first to discover this “feature”.

iTunes 12.9.4.61, the latest beta update, has disabled the ability to use option/shift + update and restore using an IPSW file stored on locally your computer.

We tried to reproduce this “bug” on a MacBook and the results were not surprising at all. Local restores didn’t seem to work and iTunes threw a network error when used with an iPhone 7.


Apple might have disabled local restores to make things harder for jailbreakers or to ensure every user stays on the latest version of iOS.

Moreover, this feature being removed will also affect non-jailbreakers who want to download and use local IPSW firmware files.

It’s a shame that Apple is slowly and gradually removing important features from iTunes.

Back in the day, iTunes was a hub to manage your device and, unfortunately, has now been relegated to bloatware that practically offers zero value to the end user.
HOW TO UPGRADE/DOWNGRADE TO LOCAL FIRMWARE VERSIONS
DOWNGRADE ITUNES TO 12.8.2

This feature is missing only from the latest beta update. Older versions, on the other hand, still allow users to update or downgrade their devices using local firmware files.

According to our tests, iTunes version 12.8.2 is working just fine. Here’s the official download link for v12.8.2. This version, though useful, has one major limitation – it doesn’t work on macOS Mojave.


If you are a Mojave user, you must downgrade to version 12.9.2.5 to reinstate the restore feature.Sponsor ads:

Gihosoft Free iPhone Data Recovery:iphonerecovery.com

Free iPhone Data Recovery Software for Windows/Mac

Recover up to 12+ types of files, including contacts, SMS, photos, WhatsApp, Viber, notes, etc.

Restore lost data from iOS devices directly or from iTunes and iCloud backup

Recover iPhone data lost due to iOS upgrade/jailbreak, accidental deletion, device lost or broken

Support all the latest iPhone, iPad and iPod Touch

Both Free and Pro version.

If you lost data after you updated to a new iPhone, you can always use Gihosoft iPhone Data Recovery to get the data back from the old iPhone or backup.

Top 10 Best FRP Bypass Tools to Bypass Google Account on Android Device 2019

Worth reading:download youtube 1080p

Jihosoft Android Data Recovery: the best Android Data Recovery software for Windows and Mac to recover deleted contacts, messages, photos, videos, WhatsApp and etc from Android

If you use android phones, please choose Gihosoft Android Data Recovery
Tuesday, January 15, 2019

Chinese Security Researcher Shows off an iOS 12.1.2 Exploit Raising Hopes of an iOS 12 Jailbreak


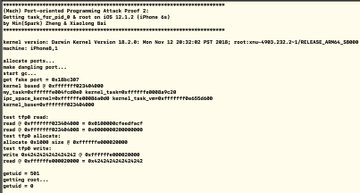
Min Zheng, a security engineer at Alibaba, has shown off an iOS 12.1.2 exploit over on Twitter. As proof, he has posted some command line screenshots of root access on iOS 12.1.2 on an iPhone 6s.

It is unlikely that we will see Zheng release the exploit to the public for the development of a possible iOS 12 jailbreak tool. He will probably end up talking about this exploit in a security conference down the line but that’s about it.

We have seen in the past that many Chinese security researchers manage to find an exploit in iOS 11 – iOS 12 but they never got around to releasing it to the public and a similar story will play out here as well.


Min(Spark) Zheng@SparkZheng

(Mach) Port-oriented Programming Attack Proof 2: Getting task_for_pid_0 & root on iOS 12.1.2 (iPhone 6s) @bxl1989

803

5:58 PM - Jan 11, 2019

271 people are talking about this

Twitter Ads info and privacy

It does seem unlikely that we will see an iOS 12 jailbreak tool being released anytime soon. Tihmstar has teased the release of “something cool” but that’s for iPhones running iOS 11 and featuring a headphone jack.

Most security researchers end up keeping the exploit they find in a new version of iOS with themselves or sell it to private companies for a hefty amount. A security researcher has found a powerful sandbox escape in iOS 12 that is powerful enough to launch Pangu’s IOHID exploit which in turn can lead to an iOS 12 jailbreak.

Are you still waiting for an iOS 12 jailbreak? Or have you given up on jailbreaking completely?

Sponsor ads:

Jihosoft iPhone Data Recovery:https://www.jihosoft.com/recovery/ios-data-recovery.html

Jihosoft iPhone Data Recovery

Free iPhone Data Recovery Software for Windows/Mac

Recover up to 12+ types of files, including contacts, SMS, photos, WhatsApp, Viber, notes, etc.

Restore lost data from iOS devices directly or from iTunes and iCloud backup

Recover iPhone data lost due to iOS upgrade/jailbreak, accidental deletion, device lost or broken

Support all the latest iPhone, iPad and iPod Touch.

Tips:

How to transfer messages from iPhone to iPhone

Gihosoft Free iPhone Data Recovery:https://www.gihosoft.com/iphone-data-recovery-free.html


Gihosoft iPhone Data Recovery Free

Thursday, January 10, 2019

How to Delete iCloud Account Online 2019


How to Delete iCloud Account Online

To delete iCloud account means losing most of your data and services. Secondary applications will also be deleted. Before you tap on the delete button, check on the Disabling iMessage section, especially if you had switched to another type of phone.

Download all files and messages from iCloud and save it on your PC or external hard drive. This is important because you will not have access to iCloud Drive Storage and iCloud Mail.

Steps on how to delete iCloud account online:

Step 1: Go to Apple ID website, https://appleid.apple.com/.

Step 2: Enter your email address and password to log in to your Apple ID account.

Step 3: Click on “get support PIN” or “Support PIN” depending on your authentication settings.

Step 4: Click on the blue button on the right side to generate PIN.

Step 5: Note down the PIN, you will need later.

Step 6: Go to https://support.apple.com/en-us/HT201232 to review phone number.

Step 7: Call a phone number in your region to connect to an automated assistant.

Step 8: To speak to a representative, say “Apple ID” then agree to speak to a representative by saying “yes please”.

Step 9: Ask for account deletion and share your iCloud account details including the Support PIN you wrote down.


Sponsor ads:

Jihosoft iPhone Data Recovery:https://www.jihosoft.com/recovery/ios-data-recovery.html

Jihosoft iPhone Data Recovery

Free iPhone Data Recovery Software for Windows/Mac

Recover up to 12+ types of files, including contacts, SMS, photos, WhatsApp, Viber, notes, etc.

Restore lost data from iOS devices directly or from iTunes and iCloud backup

Recover iPhone data lost due to iOS upgrade/jailbreak, accidental deletion, device lost or broken

Support all the latest iPhone, iPad and iPod Touch.

Tips:

How to transfer messages from iPhone to iPhone

Gihosoft Free iPhone Data Recovery:https://www.gihosoft.com/iphone-data-recovery-free.html


Gihosoft iPhone Data Recovery Free

Thursday, January 3, 2019

NoYTHoverCards–How to Disable YouTube overlay at the end of videos


YOUTUBE HOVER CARDS EXPLAINED

In May 2017, YouTube scrapped annotations and replaced them with “hover cards”, a slick thumbnail overlay that creators can add to their videos.

Generally, these overlays are used to add recommended videos that users can watch instantly. They are highly intrusive and can block almost 80% of the video.

YouTubers tend to add hover cards towards the end of their videos. However, that doesn’t make them any less intrusive.

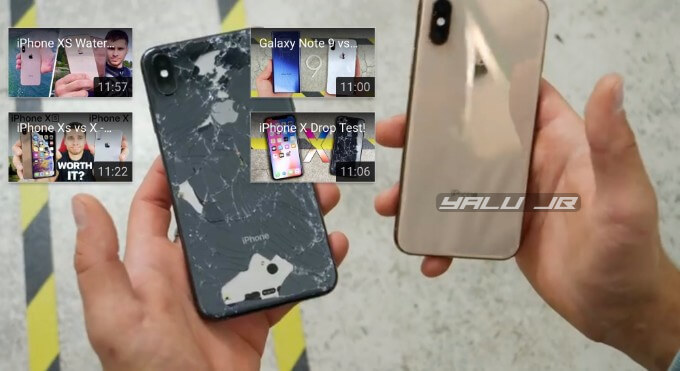
Here’s how the hover cards look like in action in an EverythingApplePro video.


You can’t disable these using AdBlock unless you explicitly add them to its element hider. Since we are jailbreakers, we aren’t bound by the same restrictions as our non-jailbroken counterparts.

NoYTHoverCards for YouTube tweak by tweak developer level3tjg easily lets you block hover cards in an instant. Here’s how you can install this tweak on your iPhone, iPad, or iPod touch.
REQUIREMENTS


iPhone, iPad, or iPod touch


iOS 11.0 firmware or above


Cydia Sponsor ads:


Jihosoft iPhone Data Recovery:https://www.jihosoft.com/recovery/ios-data-recovery.html


Jihosoft iPhone Data Recovery


Free iPhone Data Recovery Software for Windows/Mac


Recover up to 12+ types of files, including contacts, SMS, photos, WhatsApp, Viber, notes, etc.


Restore lost data from iOS devices directly or from iTunes and iCloud backup


Recover iPhone data lost due to iOS upgrade/jailbreak, accidental deletion, device lost or broken


Support all the latest iPhone, iPad and iPod Touch.


Tips:


How to transfer messages from iPhone to iPhone


Gihosoft Free iPhone Data Recovery:https://www.gihosoft.com/iphone-data-recovery-free.html


Gihosoft iPhone Data Recovery Free


HOW TO HIDE YOUTUBE HOVER CARD OVERLAY AT THE END OF A VIDEO
INSTALL NOYTHOVERCARDS

Step 1 Open Cydia.

Step 2 Go to the Sources tab and tap Edit > Add.

Step 3 Enter the URL of level3tjg’s Cydia repository – https://level3tjg.github.io/.

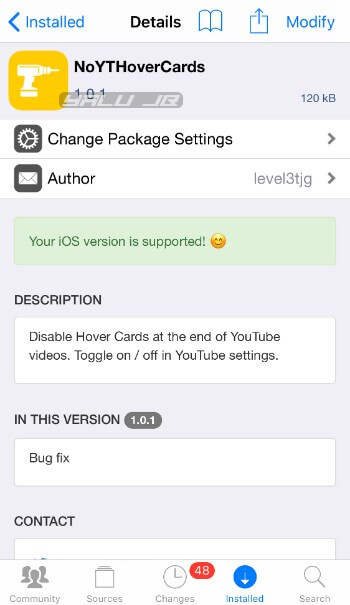
Step 4 Go the search tab and input “NoYTHoverCards”.

Step 5 Select the very first result that comes up and tap the Install button to install this tweak.


Step 6 Once the installation finishes, tap the Restart SpringBoard button to ensure the changes take effect.
TOGGLE OFF HOVER CARDS

Step 7 Go back to your home screen and open the stock YouTube app. Make sure you aren’t using Cercube or any other YouTube tweak since NoYTHoverCards is incompatible with almost all third-party tweaks that hook into YouTube.

Step 8 Tap YouTube profile picture present in the top-right corner of the display.

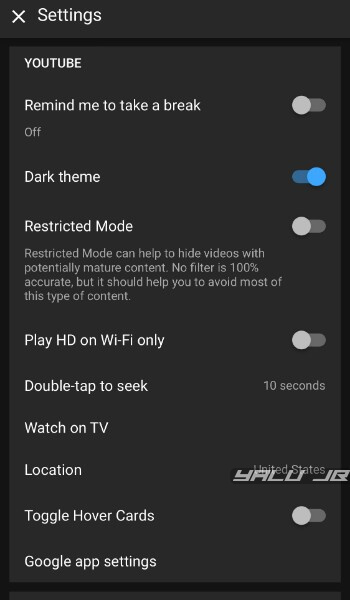
Step 9 Select the Settings icon, scroll down and toggle off Toggle Hover Cards.


That’s all there’s to it. You can now watch videos till the end without clicking on recommended videos.


RE-ENABLE HOVER CARDS

Step 10 (Optional) If you want to enable the overlays again, simply go back to the YouTube app, select your profile picture, go to Settings and toggle on Hover Cards.

YOUTUBE HOVER CARDS EXPLAINED
In May 2017, YouTube scrapped annotations and replaced them with “hover cards”, a slick thumbnail overlay that creators can add to their videos.

Generally, these overlays are used to add recommended videos that users can watch instantly. They are highly intrusive and can block almost 80% of the video.

YouTubers tend to add hover cards towards the end of their videos. However, that doesn’t make them any less intrusive.

Here’s how the hover cards look like in action in an EverythingApplePro video.


You can’t disable these using AdBlock unless you explicitly add them to its element hider. Since we are jailbreakers, we aren’t bound by the same restrictions as our non-jailbroken counterparts.

NoYTHoverCards for YouTube tweak by tweak developer level3tjg easily lets you block hover cards in an instant. Here’s how you can install this tweak on your iPhone, iPad, or iPod touch.

REQUIREMENTS
iPhone, iPad, or iPod touch
iOS 11.0 firmware or above
Cydia
HOW TO HIDE YOUTUBE HOVER CARD OVERLAY AT THE END OF A VIDEO
INSTALL NOYTHOVERCARDS
Step 1 Open Cydia.

Step 2 Go to the Sources tab and tap Edit > Add.

Step 3 Enter the URL of level3tjg’s Cydia repository – https://level3tjg.github.io/.

Step 4 Go the search tab and input “NoYTHoverCards”.

Step 5 Select the very first result that comes up and tap the Install button to install this tweak.

NoYTHoverCards

Step 6 Once the installation finishes, tap the Restart SpringBoard button to ensure the changes take effect.

TOGGLE OFF HOVER CARDS
Step 7 Go back to your home screen and open the stock YouTube app. Make sure you aren’t using Cercube or any other YouTube tweak since NoYTHoverCards is incompatible with almost all third-party tweaks that hook into YouTube.

Step 8 Tap YouTube profile picture present in the top-right corner of the display.

Step 9 Select the Settings icon, scroll down and toggle off Toggle Hover Cards.


That’s all there’s to it. You can now watch videos till the end without clicking on recommended videos.


RE-ENABLE HOVER CARDS
Step 10 (Optional) If you want to enable the overlays again, simply go back to the YouTube app, select your profile picture, go to Settings and toggle on Hover Cards.

Find Your Next Dependable Charging Cord Here [Deals Hub]

There’s no such thing as too many charging cables. Fortunately, these days there are plenty of options when it comes to color and length. We...