Monday, October 29, 2018

2 Ways to Turn Off iPhone Xs (Max) 2019


2 Ways to Turn Off iPhone Xs (Max)

The following methods are available for iPhone Xs (Max), iPhone XR and iPhone X.
Turn off iPhone Xs (Max) with Buttons

As mentioned above, you cannot turn off iPhone Xs via the Side button because it summons Siri instead of showing the “slide to power off” option. You can however, turn off the device with the combination of Side button and Volume button. Here are the steps on how to do this:


Press the Side button and Volume Down or Up button and hold them.


Once the screen changes, release the buttons and slide the top toggle to the right. The device will be turned off.


Turn off iPhone Xs (Max) from Settings

Apart from shutting down iPhone Xs via Side and Volume Down/Up buttons, you can also turn it off via the Settings app. You will need to crawl through a couple of pages in the Settings app but the overall process is pretty simple.


Open Settings app on your iPhone Xs.


Navigate to General > Shut Down.


Now slide the top toggle to the right to turn off the device.


Turning on iPhone Xs is pretty easy once it has powered down. You simply need to press and hold the Side button for a few seconds until the Apple logo appears on the screen.
Bonus Tips to Manage Your iPhone Xs Easier
How to Force Restart iPhone Xs (Max)?

You will need to force restart your iPhone Xs if its screen gets frozen or you encounter a black screen problem. The method to force restart iPhone Xs is also different from force restarting iPhone 8 series and below.If you lost data after you updated to a new iPhone, you can always use Gihosoft iPhone Data Recovery to get the data back from the old iPhone or backup.

You may also like:iPhone Backup Extractor - Extract Data from iPhone Backup

Must Read:Jihosoft iTunes Backup Unlocker
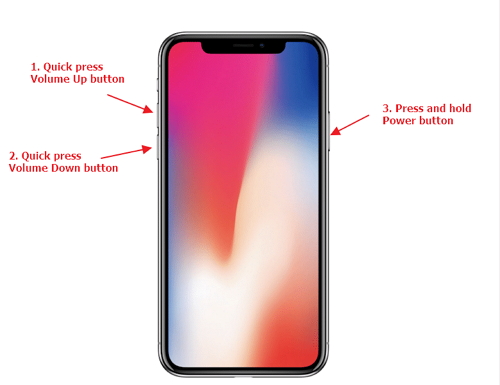
Steps to Force Restart iPhone Xs


Press the Volume Up button and then quickly release it.


Press the Volume Down button and then quickly release it.


Now press the Side button and hold it until the device restarts.


Thursday, October 25, 2018

2019 Top Guide Recover Missing WhatsApp Pictures


2019 Top Guide Recover Missing WhatsApp Pictures

1 Recover Missing WhatsApp Pictures with iTunes Backup

In this section, let’s see how to recover deleted iPhone WhatsApp pictures using iTunes.


As the first step of this process, you should open iTunes on your computer. Then, you should connect the iOS device to your computer with a USB cable. If prompted, provided the passcode or trust the computer according to the onscreen steps.


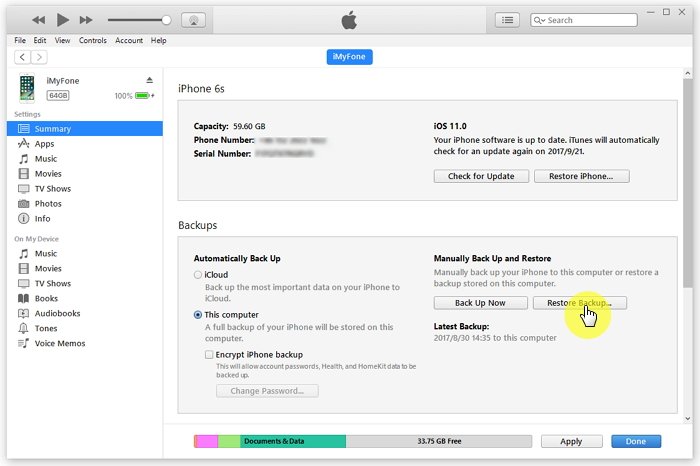
You should now select the iOS device when it appears in iTunes. Then, select Restore Backup in iTunes. Be sure that your iOS version is up-to-date to proceed.


You should now select the backup you need to restore simply by looking at the data and size of the backup. Click on “Restore” option and wait for the process to be completed. If prompted, provide the password for your encrypted backup.


Be sure that the device stays connected to the computer until the process is completed.


2 Recover Disappeared WhatsApp Pictures with iCloud Backup

If you need to recover data like deleted WhatsApp data from your iCloud backup, here’s how to do it.


Turn on the iOS device and then you will notice a welcome screen. If your have configured the device already, you should erase the contents of the device before proceeding to the next level. Now, you should do according to the onscreen setup steps and reach “Apps & Data Screen”. You should then tap Restore from iCloud Backup.


Use your Apple ID and sign into the iCloud account. Now, you should select a backup simply after referring to the data and the size. The transfer will then start. However, if it requires a newer iOS version, you must update the existing version.


Sign in to the Apple account in order to restore the apps.


Now, you should wait until the process is completed.


Finish the setup on the device. If you have a large backup to restore, the process may continue as a background process.


If you lost data after you updated to a new iPhone, you can always use Gihosoft iPhone Data Recovery to get the data back from the old iPhone or backup.

Must Read:Jihosoft iTunes Backup Unlocker
You may also like:online youtube downloader

Saturday, October 13, 2018

What is iTunes Dark Mode and How to Use it?


What is iTunes Dark Mode and How to Use it?

What is iTunes Dark Mode?

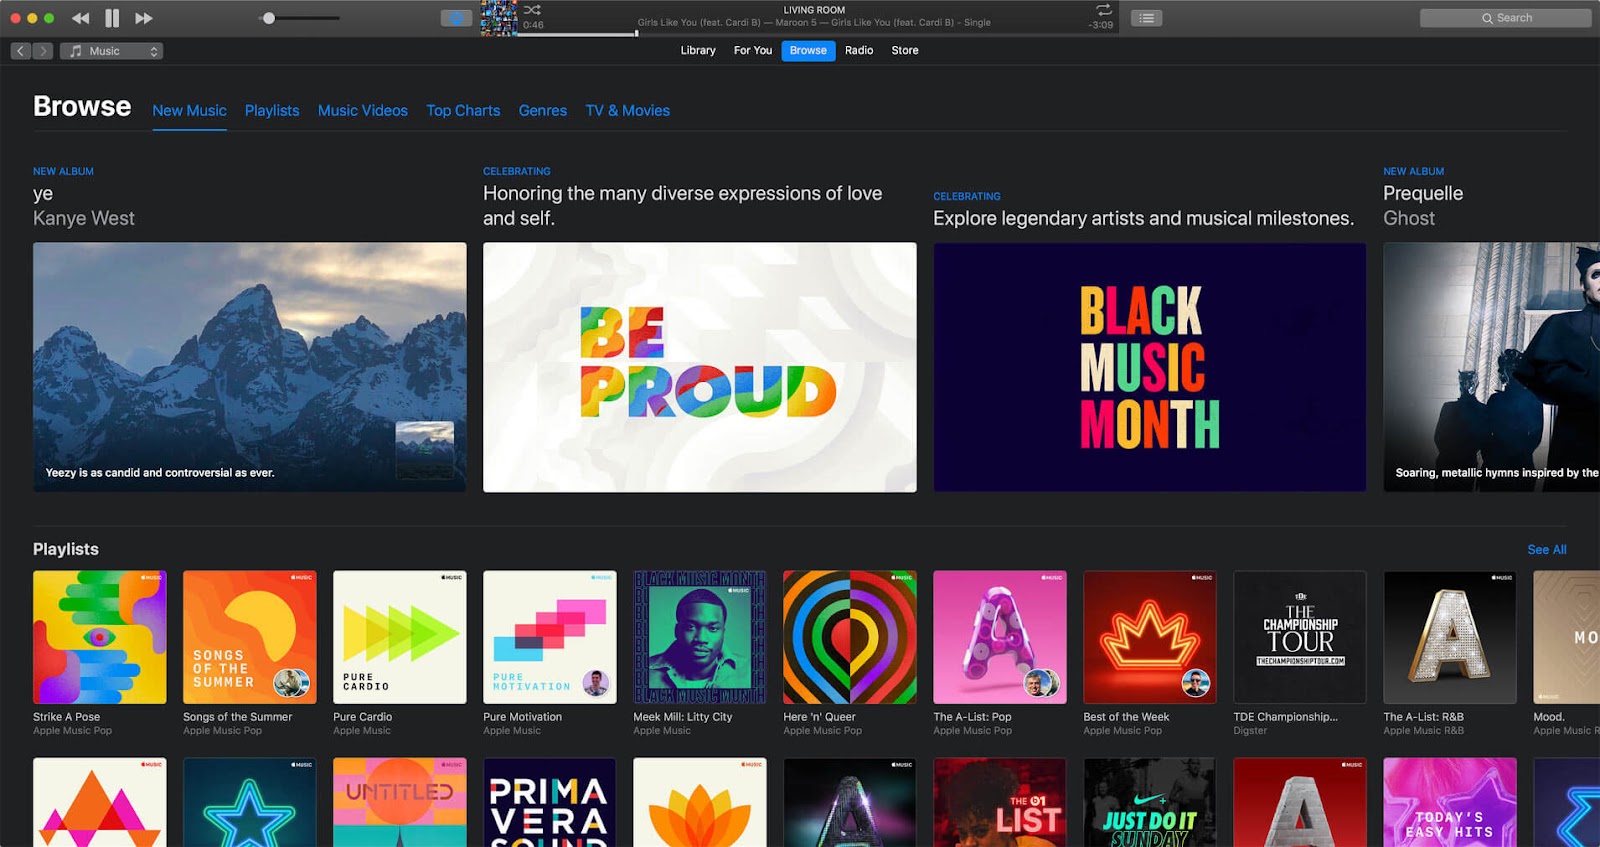
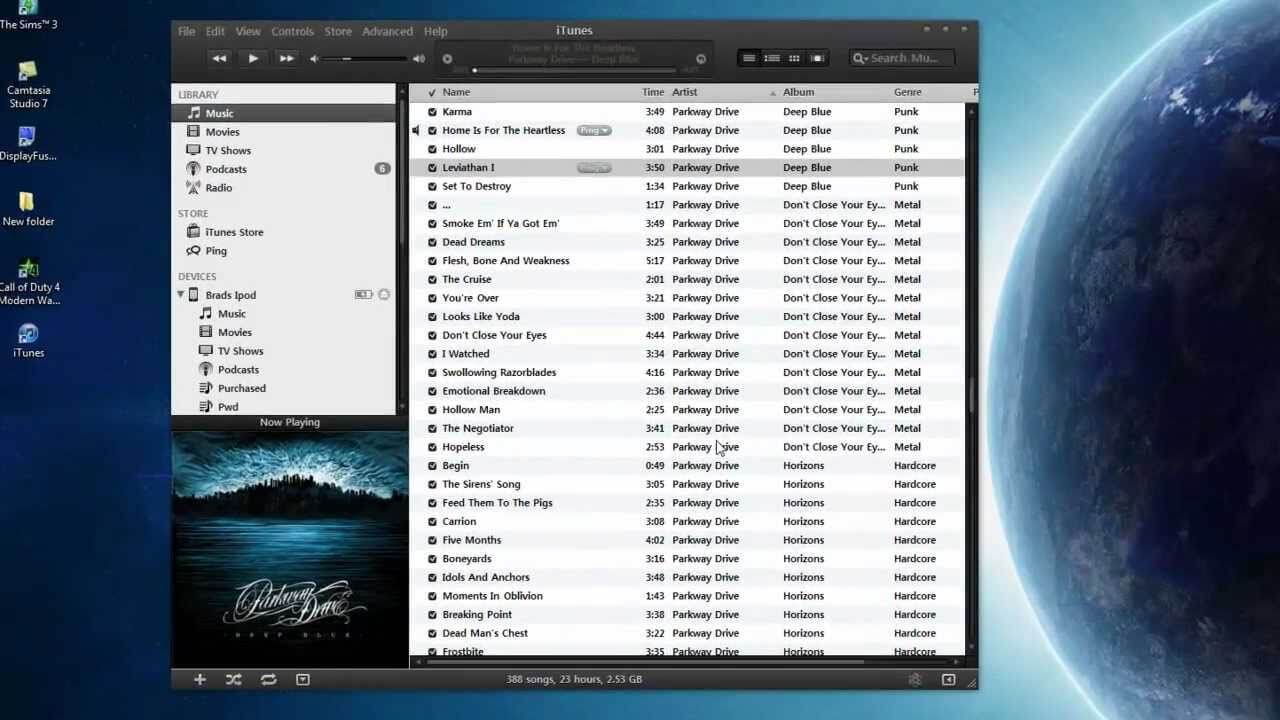
In macOS Mojave’s Dark Mode, most of your operating system’s bright features will go dark of gray. This includes features like the dock, trashcan, menu bar, and system panel. Some macOS Mojave apps will also share in this feature, and such apps include iTunes, Safari, App Store, News, etc.

Therefore, with iTunes Dark Mode, using iTunes at late hours of the night won’t have much strain on the eyes. It will be very handy for those who play songs with iTunes for lengthy periods, and at late hours of the night.
How to Use iTunes Dark Mode

If you’ve been waiting so long for iTunes dark mode, which would come with macOS Mojave on September 24, then it will be awesome if you can learn how to use/enable iTunes dark mode on Mac or PC before the official release date Mac’s next operating system.
#1. iTunes Dark Mode on Mac

Apple Inc. has finally added Dark Mode to macOS Mojave. This feature will cut across all Mac features and software to dim many of the screen elements from their usual blinding white to soothing dark tone.

Here is how to set up dark mode on Mac:

Step 1. If you skip past the prompt to set up dark mode when installing macOS Mojave, then click the Apple logo at the top left corner of your window.

Step 2. Select “System Preferences > General”.


Step 3. Under Appearance menu, select the Dark Mode preview. The dark mode preview will show you the levels of dark background that’s available.

However, if you want to have dark mode only at night, you can go for Dynamic Desktop option to achieve that.

Step 1. Go to “System Preferences > Desktop & Screen Saver”.

Step 2. Select a desktop with a curvy icon on it; that’s a dynamic desktop.
#2. iTunes Dark Mode on Windows PC

macOS Mojave now has a dark mode, but Windows 10 users have been enjoying this feature for quite a time now. Windows’ built-in dark mode turns windows black and changes the text and icon to light colors. On Windows, you can activate dark mode just with few steps, and we’ve outlined the steps in the following paragraphs.

Step 1. Search for “Settings” on the Windows 10 search bar and launch it.

Step 2. Click “Personalization”. This feature will display a paintbrush on the computer screen.

Step 3. Click “Colors > Choose your app mode > Dark > and check the bubbles beside the dark”.

Step 4. Pick an accent color at the top of the “Color” window.


Gihosoft Photo Eraser Erase unwanted objects and perfect your amazing photos!

If you lost data after you updated to a new iPhone, you can always use Gihosoft iPhone Data Recovery to get the data back from the old iPhone or backup.

Must Read:Jihosoft iTunes Backup Unlocker

Jihosoft Photo Eraser

Free iTunes/iPhone Backup Extractor for iPhone, iPad

iPhone Backup Extractor - Extract Data from iPhone Backup

You may also like:online youtube downloader

Monday, October 8, 2018

How to Achieve iPhone Disabled Fix without iTunes 2019


How to Achieve iPhone Disabled Fix without iTunes 2019

Achieve iPhone Disabled Fix without iTunes Tips

If you are facing the problem of iPhone disabled and don’t want to use iTunes, then you can fix your disabled iPhone through any of the following ways.
1. Unlock Disabled iPhone with Find My iPhone

Most people don’t know that there are other ways to achieve iPhone disabled fix without iTunes. A useful way of solving this issue is via Apple’s Find My iPhone feature. This allows you to lock, locate or reset your iDevice remotely. The following steps will guide you.

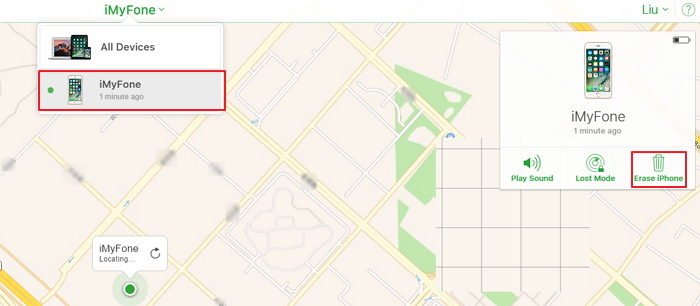
Step 1: Log into your iCloud account and visit the Find My iPhone feature, then click on the DEVICE option.

Step 2: Choose the iDevice that has been disabled.

Step 3: Now, find your iPhone, play a sound on it and lock it. You need to erase your device if you want your iPhone 6 disabled fix without iTunes.

Step 4: Tap on the ERASE DEVICE option and confirm. The Find My iPhone feature will also erase your iPhone remotely.


Gihosoft Photo Eraser Erase unwanted objects and perfect your amazing photos!

If you lost data after you updated to a new iPhone, you can always use Gihosoft iPhone Data Recovery to get the data back from the old iPhone or backup.

Jihosoft Photo Eraser

Free iTunes/iPhone Backup Extractor for iPhone, iPad

iPhone Backup Extractor - Extract Data from iPhone Backup

You may also like:online youtube downloader

Wednesday, October 3, 2018

How to Restore iPhone with iTunes to Remove Passcode

How to Restore iPhone with iTunes to Remove Passcode


1 Restore iPhone with iTunes to Remove Passcode

Another method you can use to recover your device is to erase it with iTunes. This action will help you to remove the passcode on your device, but the only way this option will work is if you have synced your iPhone to iTunes.

Here are the steps to follow:


First, connect your iPhone to the computer you previously synced your iPhone with.


Go to iTunes and open. If passcode is required, you may have to try your hand on another computer or make use of the recovery modes if available.


Allow time for iTunes to synchronize your iPhone and then make a backup.


As soon as you synced and backup your device, click 'Restore'.


At the setup screen during the restoration process, click on 'Restore from iTunes backup.'


Once in iTunes, select your device, and then take a look at the size and the date of each of your backups. Select the important ones you need.


2. Restore iPhone with Recovery Mode to Remove Passcode

If you happen not to have synced your device with iTunes or launch Find My iPhone in iCloud, the next best option to restoring your device is to make use of the recovery mode. Here are the steps to follow:


After your iPhone is connected to the PC, open up iTunes.


With the device still connected to the computer, force it to restart. This works on different devices:


Go to iTunes and open. If passcode is required, you may have to try your hand on another computer or make use of the recovery modes if available.

i. If using iPhone 8, iPhone 8 Plus/iPhone X: You should press down and quickly let go the Volume Up button. Repeat the process with the Volume Down button and proceed to hold the Side button until the Recovery-mode screen appears

ii. If using iPhone 7 and iPhone 7 Plus: Press down both the Volume Down and Side buttons simultaneously. Do not release until the recovery mode screen appears.

iii. If using iPhone 6s: Press and hold both the Home and the Side (or Top) buttons simultaneously until the recovery-mode shows up.


Two options will show up: 'Restore' and 'Update'. Choose 'Restore'. At this, iTunes will download the appropriate software for your device. However, if it exceeds 15 minutes, your iPhone may exit the recovery mode, and you may need to repeat the previous steps.


Wait until the process finishes, and then set up your iPhone.


Gihosoft Photo Eraser Erase unwanted objects and perfect your amazing photos!

If you lost data after you updated to a new iPhone, you can always use Gihosoft iPhone Data Recovery to get the data back from the old iPhone or backup.

Jihosoft Photo Eraser

Free iTunes/iPhone Backup Extractor for iPhone, iPad

iPhone Backup Extractor - Extract Data from iPhone Backup

Jihosoft Android Data Recovery: the best Android Data Recovery software for Windows and Mac to recover deleted contacts, messages, photos, videos, WhatsApp and etc from Android devices.

Gihosoft Android data recovery Free is a super awesome software specialized in Android file recovery. With this program, you are able to recover deleted photos, music, videos, messages, contacts, call logs, WhatsApp messages, Viber chat history and more from Samsung, Huawei, LG, HTC, Motorola, Google, Oneplus, Sony, Lenovo, ZTE and other Android devices directly.
You may also like:online youtube downloader

Wednesday, September 19, 2018

How To Remove Instagram Followers Without Blocking


Back in the day’s people had limited options for staying connected with the people they know. But with modern and upgraded technology surely the tables have turned. As nowadays we don’t have to wait any longer if we want to talk to someone. Just grab your mobile and simply call or text the other person, because now the options are limitless. And with the launch of an enormous number of social networking sites, the communication process has become more quick and easy. As social media has the power to make you reach everyone you have met in your life.

Worth Reading: The Best Snapchat Like Face Filter Apps

And talking about social networking sites without mentioning Instagram is simply a crime. As Instagram is a simple, fun, and creative way to share photos and videos which is visible to everyone in your profile. Also, it is a great medium to connect with people through messaging and now with the latest update even with live calls. But there are times when this advantage of connecting with people turns out to be a disaster. Although Instagram has privacy settings which ensure that outside users have to first send you a request to be a part of your profile.


But still sometimes you just unknowingly add someone to your profile and you immediately realize it was a bad move. Earlier the most common way to remove someone from your follower’s list was to block them directly. But no one wants to be that rude with someone you know or even if you don’t know. So stop compromising and don’t hesitate, as there is one much easy and acceptable method where you can remove someone from your Instagram without even blocking them.


Note: If you have a public account on Instagram then you first have to switch your account to private to follow this steps.


Steps To Remove Instagram Followers Without Blocking:


Go to your Instagram profile.


Tap ‘Followers’ from the top of the screen.


Select the follower you want to remove and click on the three dots from the right corner.


You will get two option ‘Cancel’ and ‘Remove’.


Tap on ‘Remove’ and that person will be removed from your profile immediately.


Note: This method works for both Android as well as iPhone.


Related Posts:

8 Solutions to Fix Camera Not Working on Android

The Best 5 Call Blocker Apps for Android

Photoshop Alternatives: Best 6 Free Photo Editing Softwares for Windows

Top 10 Best Camera App for Android Phones?

How to Repair Broken Buildings or Other Objects in Photos

How to Clone Yourself and Other Objects in a Picture Without Photoshop


If you find this article helpful do like and share your views in the comment box.


Jihosoft Photo Eraser

Erase unwanted objects and perfect your amazing photos!

Remove objects from photos with Photo Eraser is almost as easy as taking a shot. Now you can use this tool to erase undesirable objects from your pictures, such as tourists, watermarks, logos, texts, blemishes and other unwanted things without real photo-editing skills required at all.


Jihosoft Android Data Recovery

The most powerful and professional data recovery software for Android that can restore deleted or lost contacts, photos, videos, audios, SMS, call logs, WhatsApp chat, Viber messages from any Android devices due to accidental deletion, virus attack, formatting. It supports all popular Android smartphones and tablets like Samsung, HTC, LG, Huawei, Motorola, Nexus, etc. In the meantime, you will be guided step by step if you never used this kind of tool before.


Tuesday, September 18, 2018

How to Restrict Apps on iPhone (iPad) in iOS 12/11? [2019 Solved]


How to Restrict Apps on iPhone (iPad) in iOS 12/11? [Solved] 2019


The Parental Controls also known as Restrictions on your iPhone allowing you to manage which apps, features, and content can and cannot be accessed on your iPhone. In other words, Restrictions give you the power to choose the apps other people can access or cannot access using your device. This feature also lets you set the Screen Time for particular apps.
Restrict Apps on iPhone with iOS 12

Restricting apps in iOS 12 is not similar to iOS 11. In fact, Restrictions are now under Screen Time in the Settings app. Here are the steps:

Step 1: Open Settings on your Home Screen and touch on Screen Time

Step 2: Click on Set up as Parent. There will be a App Limits interface.

Step 3: Check the apps you want to restrict and tap Set App Limit.


By doing so, you will have restricted the apps and they will not be visible on your Home Screen. You can re-enable them by going through the same process.
Restrict Apps on iPhone with iOS 11 and Below

If you own an iOS 11 device or below, you can restrict apps and prevent your kids from spending the whole day playing or chatting on your iPhone device. Here are the steps on how to restrict apps on iOS 11 and below:

Step 1: Open the Settings > General > Restrictions

Step 2: Click on Enable Restrictions. You will have to enter a passcode that you will use to either enable or disable the apps


Step 3: Toggle the Switch next to the specific app you would like to turn off.

Gihosoft Photo Eraser Erase unwanted objects and perfect your amazing photos!

If you lost data after you updated to a new iPhone, you can always use Gihosoft iPhone Data Recovery to get the data back from the old iPhone or backup.

Jihosoft Photo Eraser

Free iTunes/iPhone Backup Extractor for iPhone, iPad

iPhone Backup Extractor - Extract Data from iPhone Backup

Jihosoft Android Data Recovery: the best Android Data Recovery software for Windows and Mac to recover deleted contacts, messages, photos, videos, WhatsApp and etc from Android devices.

Find Your Next Dependable Charging Cord Here [Deals Hub]

There’s no such thing as too many charging cables. Fortunately, these days there are plenty of options when it comes to color and length. We...